Meta Business Suite (formerly Facebook Business Suite) offers a robust platform for managing your business presence across Facebook, Instagram, and WhatsApp. Adding a payment method to your WhatsApp Business account via Meta Business Suite streamlines transactions, making it easier for your customers to pay for your products and services. This detailed guide will walk you through the process step by step.
Step 1: Set Up Meta Business Suite
Log In
- Access Meta Business Suite: Open your web browser and go to Meta Business Suite.
- Log In: Use your Facebook account credentials linked to your business. If you don’t have an account, create one by following the on-screen instructions.
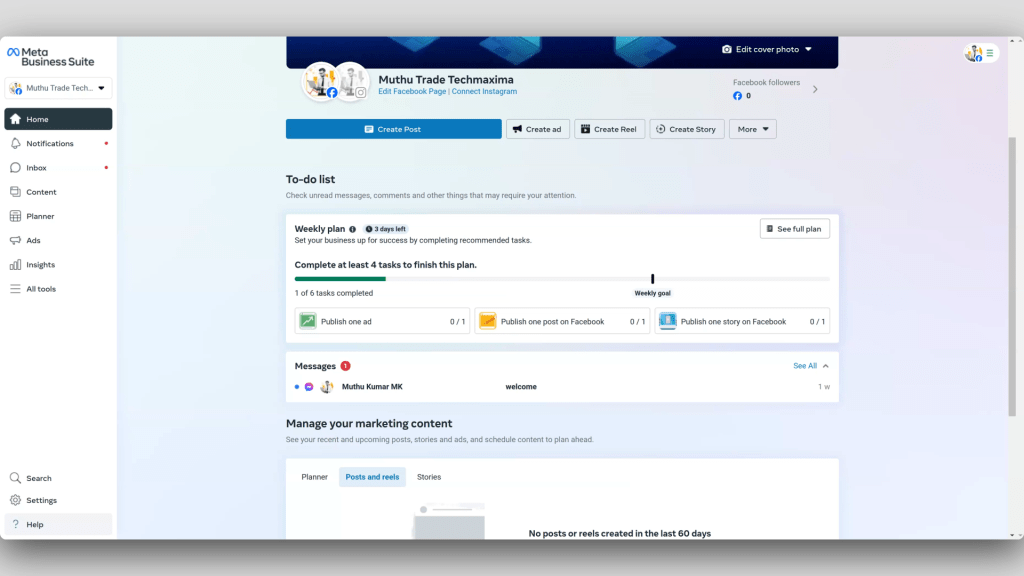
Step 2: Navigate to Settings
- Open Meta Business Suite: Ensure you are logged in and on the main dashboard.
- Go to Settings: Click the settings icon at the bottom left corner to access the settings menu.
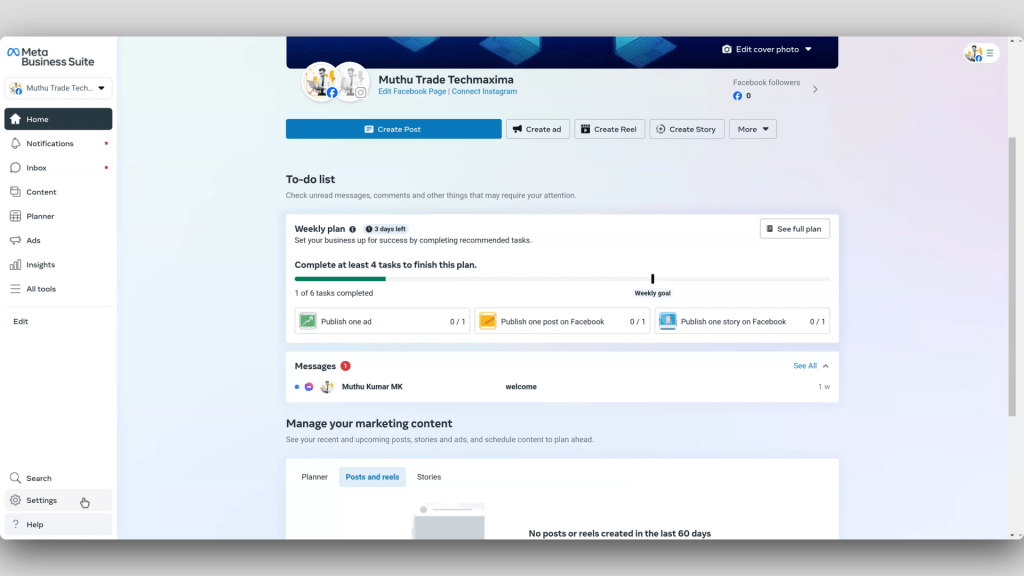
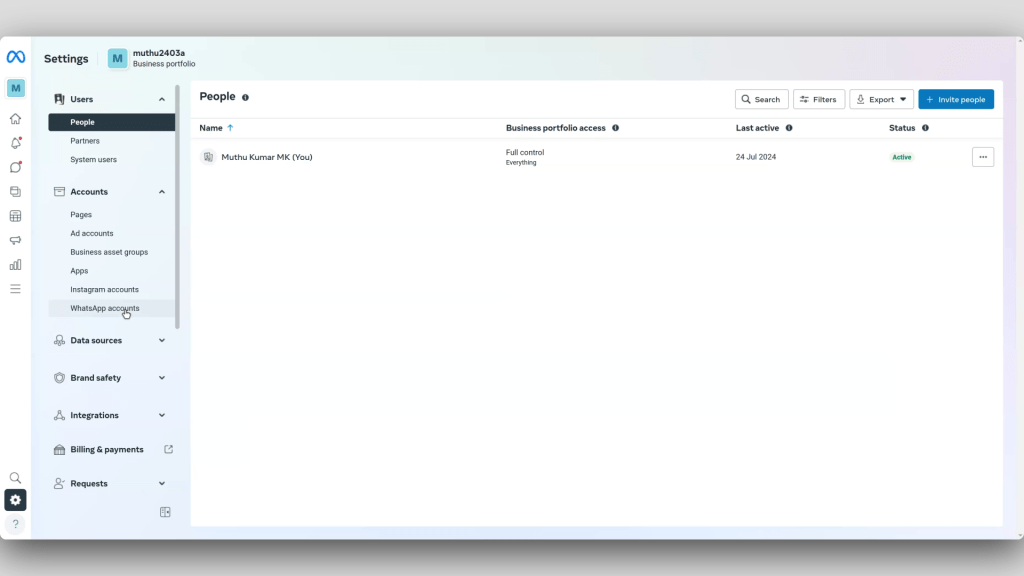
Step 3: Choose the Account
- Accounts Section: In the settings menu, find and click on the “Accounts” section on the left sidebar.
- Select WhatsApp Accounts: From the list of accounts, select “WhatsApp accounts.”
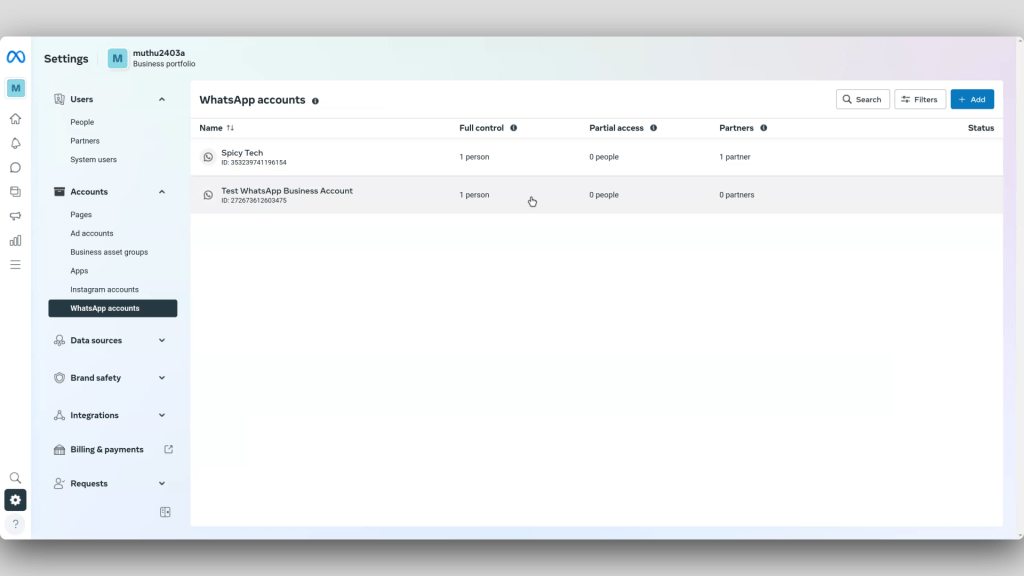
Step 4: Select the WhatsApp Account
- Choose Your Account: Click on the specific WhatsApp Business account you want to manage payments for.
Step 5: Access Payment Settings
- Payment Settings: On the WhatsApp account management page, find and click on “Payment settings.”
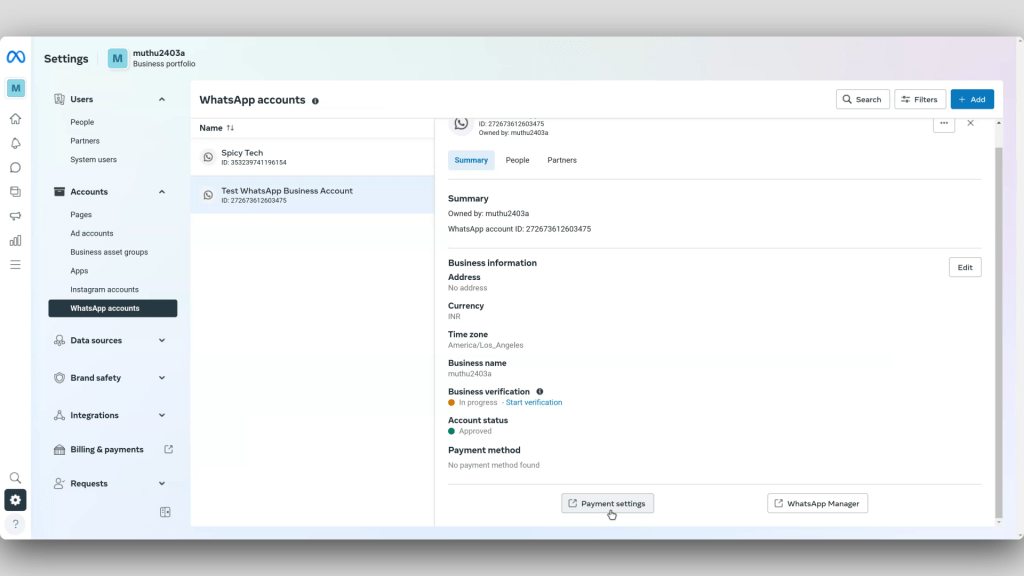
Step 6: Add a Payment Method
- Initiate Payment Method Addition: In the payment settings, click on “Add payment method.”
- Enter Business Location and Currency: Provide your business location and select the appropriate currency.
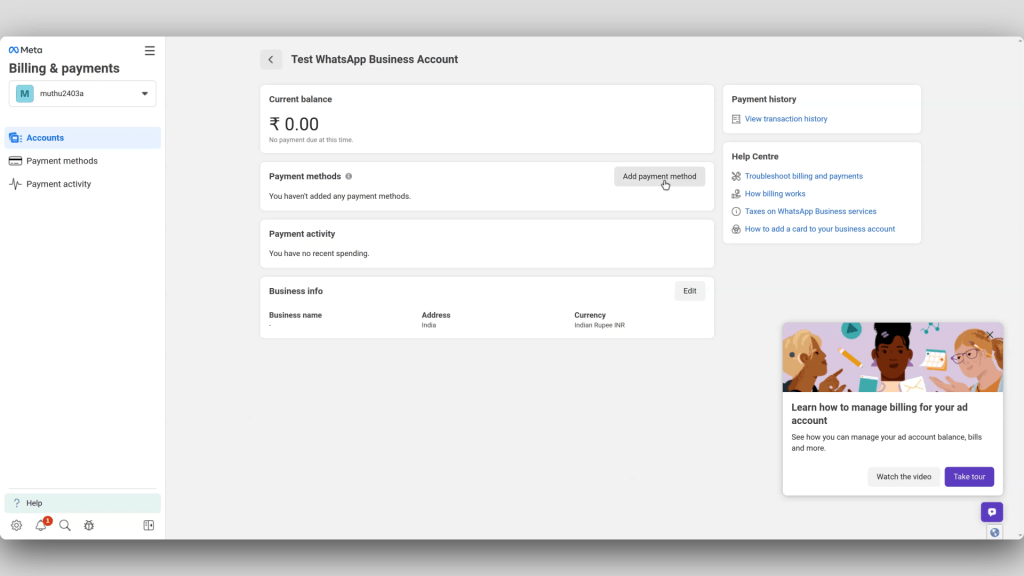
Step 7: Choose and Enter Payment Method
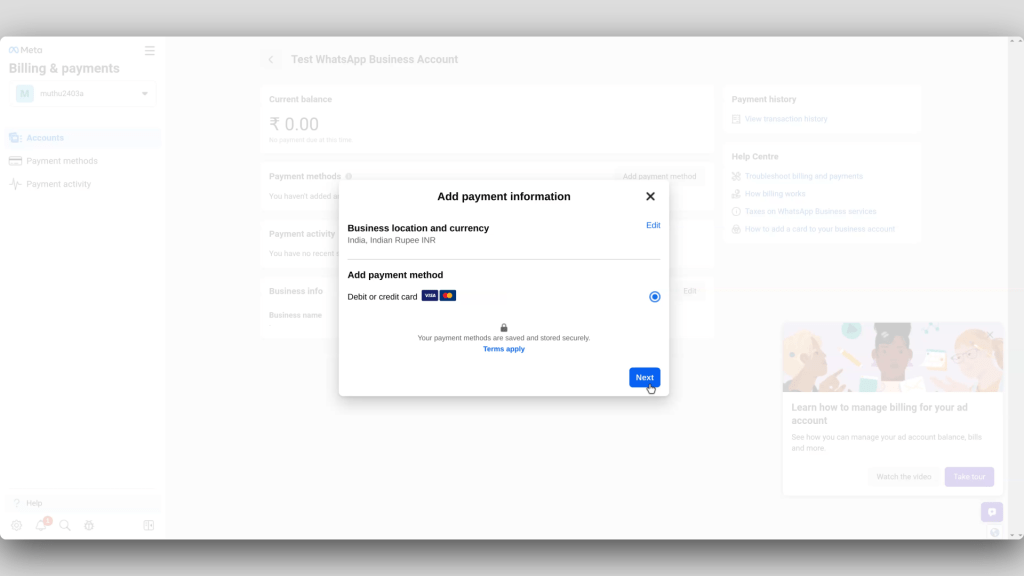
- Select Payment Method: Choose your preferred payment method, either debit or credit card.
- Enter Card Details: Fill in the required card details:
- Name on Card: Enter the name exactly as it appears on your card.
- Card Number: Enter the 16-digit card number.
- Expiry Date: Provide the card’s expiration date (MM/YY).
- CVV: Enter the card verification value, a 3-digit code usually found on the back of the card.
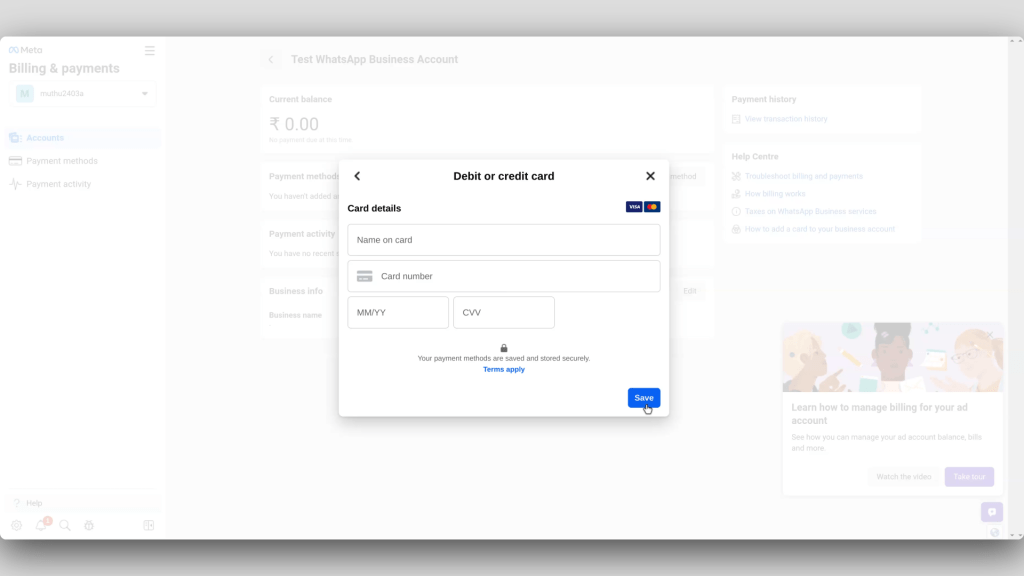
Step 8: Complete and Save Payment Method
- Save Payment Method: After entering all the card details, click “Save” to securely store your payment method.
Step 9: Verify Payment Method (If Required)
- Complete Verification: Some card issuers may require additional verification steps. Follow any prompts to verify your card details as needed.
Step 10: Test the Payment Method
- Create a Test Payment Request: Open your WhatsApp Business app, start a chat, tap the attachment icon, and select “Payment” (if available).
- Send and Complete Test Transaction: Send the payment request to a test contact or a secondary number and follow the prompts to complete the transaction, ensuring everything works correctly.
By following these steps, you can effectively add a payment method to your WhatsApp Business account using Meta Business Suite. This will make transactions more convenient for your customers and easier for you to manage.

I can’t add the payment method for onboarding customers via the embedded signup flow. If anyone has a solution, please share it.
Pingback: WhatsApp Business Growth: Find More Channels & Customers on Meta Ecosystem
💔💔💔