If you have read about the Model Context Protocol and want to try it, the first real hurdle is practical: how do you connect an MCP server to the assistant you already use? Every client hides the setting somewhere different, some want a config file, some want a URL pasted into a form, and the error messages when it goes wrong are not helpful.
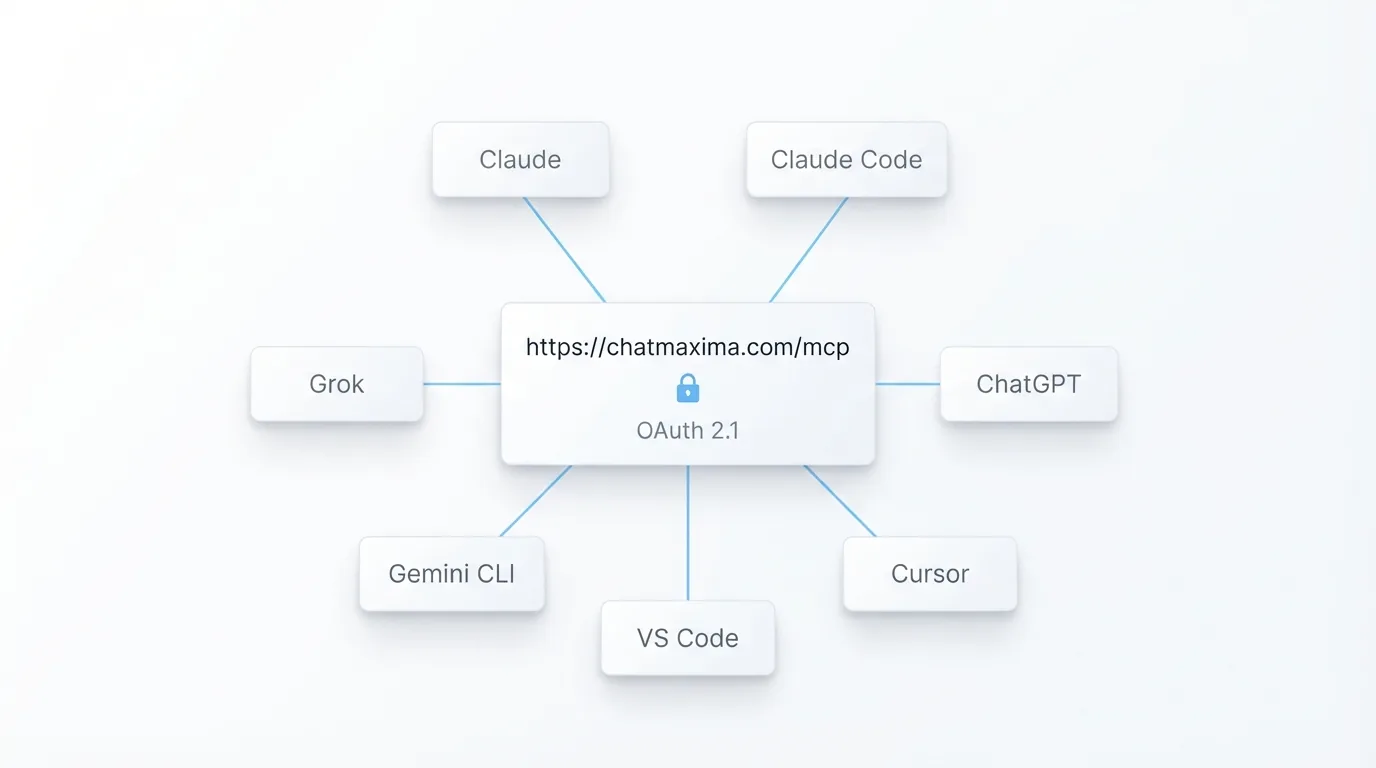
This guide covers the connection step for every major client in one place: Claude on the web and desktop, Claude Code, ChatGPT and Codex, Cursor, VS Code with GitHub Copilot, Gemini CLI, and Grok plus its Grok Build terminal agent. The worked example is the ChatMaxima MCP server, which lets an assistant build chatbots, write WhatsApp templates and work a shared inbox, but the steps are the same for any remote MCP server that uses OAuth.
If you are not yet sure what an MCP server is, start with our explainer on what an MCP server is and how it works, then come back here. This post is the hands-on half.
What you need before you connect an MCP server
Three things decide how the connection goes, so check them first.
The server’s URL. A remote MCP server is a single HTTPS address, for example https://chatmaxima.com/mcp. That is all a client needs to find it. If the server you want to use is “local” (something you run on your own machine with a command such as npx), the steps differ, and only the coding tools below support that kind of server.
How the server authenticates. Modern remote servers use OAuth 2.1. The client opens a sign-in page in your browser, you log in to the service as yourself, approve what the assistant may access, and the client stores a token. You never copy an API key into a chat app. Older or simpler servers use a static API key sent as a header, which clients such as Claude Code and Cursor also support.
Your plan on the client side. Custom connectors are a paid feature in most consumer assistants. Claude needs a paid plan for connectors, ChatGPT allows full read-and-write custom connectors on Business and Enterprise plans while Pro connects read-only, and on Grok Business and Enterprise a team admin provisions the connector before members can use it. Coding tools such as Claude Code, Cursor, VS Code and Gemini CLI read MCP servers on any plan that includes the tool.
Remote servers versus local servers
Most confusion comes from the two kinds of MCP server that look the same in a config file.
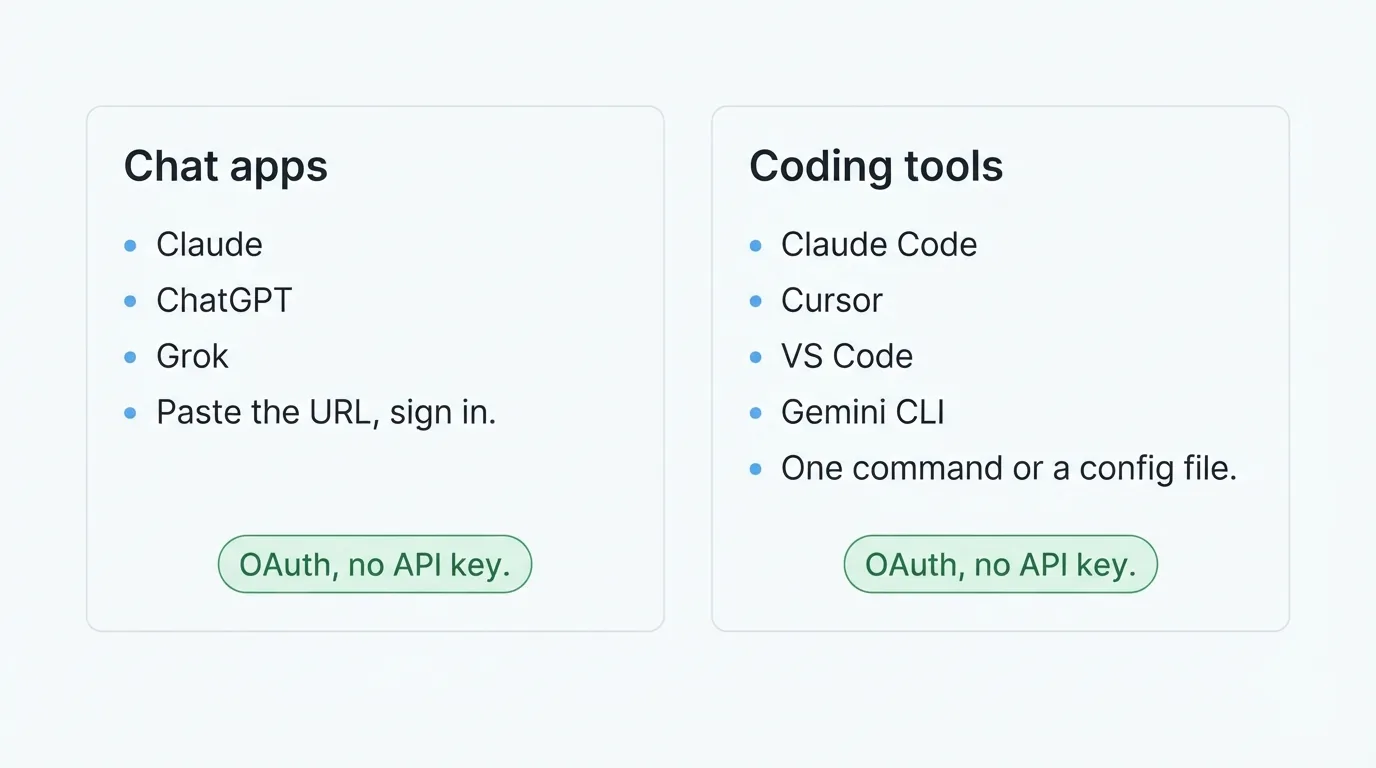
A remote server is hosted by the company whose data you want to use. ChatMaxima runs its own, so do GitHub, Notion, Stripe and others. You connect to it over HTTPS, and the company handles sign-in, scaling and updates. This is what chat apps like Claude, ChatGPT and Grok support, and it is what this guide is about.
A local server is a program that runs on your laptop and talks to the client over its standard input and output. Developers use these for filesystem access, local databases or a browser they control. Chat apps cannot reach a local server, which is why ChatGPT and Grok ask for a public URL and nothing else.
If a guide tells you to run npx something to add a server to Claude Desktop, it is a local server. If it hands you a URL, it is remote.
The three steps every client shares
Whatever client you use, connecting a remote MCP server comes down to the same sequence:
- Give the client the URL. Through a settings screen, a config file or a terminal command.
- Sign in once. The client opens the server’s consent page in your browser. You log in and approve access. With ChatMaxima you also pick which workspace the assistant may reach.
- Confirm the tools loaded. Every client has a place that lists the server’s tools. If the list is empty, the connection is not finished.
Once those three are done, you use the server by asking for things in plain language. The assistant calls the server’s tools on its own when the request needs them.
Connect an MCP server to Claude (web and desktop)
Claude calls MCP servers connectors. The built-in ones (Google Drive, Slack and so on) and custom ones you add yourself sit in the same place.
- Open Claude on the web or the Claude desktop app and go to Customize, then Connectors.
- Choose Add, then Add custom connector.
- Give it a name and paste the server URL, for example
https://chatmaxima.com/mcp. Leave the client id and secret fields empty. A server that supports dynamic client registration fills those in during sign-in. - Click Connect. The server’s sign-in page opens. Log in, choose a workspace when your account has several, and approve.
- Start a chat. The connector shows as enabled, and you can ask straight away: “Using ChatMaxima, list my chatbots and tell me which one handles order questions.”
To remove it later, go back to Connectors and disconnect. On Team and Enterprise plans an Owner adds the connector for the organization, and each member signs in with their own account, so permissions stay personal.
The docs site has the same walkthrough with screenshots for each client.
Connect an MCP server to Claude Code
Claude Code, Anthropic’s terminal coding agent, takes the URL as a command and handles OAuth itself.
claude mcp add --transport http --scope user chatmaxima https://chatmaxima.com/mcpThe --scope user flag makes the server available in every project. Leave it out and the server is added to the current folder only. If you want to share the configuration with teammates through the repository, use --scope project, which writes a .mcp.json file next to your code.
Then sign in from inside a session:
- Start Claude Code and type
/mcp. - Select the server. It shows as needing authentication the first time.
- Choose Authenticate. Your browser opens the sign-in page. Log in and approve.
- Back in the terminal,
/mcplists the server as connected, with its tool count.
A few commands worth knowing: claude mcp list shows every configured server, claude mcp get chatmaxima shows one entry, claude mcp logout chatmaxima signs out, and claude mcp remove chatmaxima deletes the entry. Anthropic documents all of them in the Claude Code MCP reference. Each tool is exposed to Claude as mcp__<server>__<tool>, which is the name to use if you write permission rules.
Claude Code also reads plugins, bundles of skills and MCP references. ChatMaxima publishes one that pairs the server with workflow skills (build a bot, fix a bot, write a template), so the agent follows a tested sequence rather than guessing from tool names.
Connect an MCP server to ChatGPT and Codex
OpenAI has two products that can use MCP, and they are set up differently.
ChatGPT
ChatGPT supports custom connectors on its web app.
- Open Settings, then Connectors. If custom connectors are behind an advanced or developer toggle on your plan, switch it on.
- Choose to add a custom connector, give it a name, and paste the server URL.
- Leave authentication as OAuth and confirm.
- Start the connection. The server’s sign-in page opens. Log in, choose the workspace, approve.
- In a chat, enable the connector from the tools menu before you ask for something.
The plan matters here more than anywhere else. ChatGPT Pro can connect a custom MCP server but only use tools that read; creating or changing anything needs a Business or Enterprise workspace. That is a ChatGPT rule, not a server rule.
Codex
Codex, OpenAI’s coding agent, reads servers from ~/.codex/config.toml. The most compatible way to connect a remote OAuth server is through the mcp-remote bridge, which runs the sign-in in your browser the first time and caches the token:
[mcp_servers.chatmaxima]
command = "npx"
args = ["-y", "mcp-remote", "https://chatmaxima.com/mcp"]
Restart Codex, finish the sign-in when the browser opens, and ask it to do something that needs the server. Newer Codex builds can point at a remote HTTP server directly; check your version’s documentation before adding the bridge.
Connect an MCP server to Cursor
Cursor reads MCP servers from a JSON file, and it also supports one-click install links.
The file can be global or per project:
~/.cursor/mcp.jsonin your home folder applies to every project..cursor/mcp.jsoninside a project applies to that project only.
Add the server entry:
{
  "mcpServers": {
    "chatmaxima": {
      "url": "https://chatmaxima.com/mcp"
    }
  }
}
Save the file. Cursor picks it up without a restart. Then open Customize in the sidebar, find the server, and click to sign in. Cursor registers itself with the server automatically, runs the OAuth flow in your browser, and lists the tools once you approve.
Cursor asks before each MCP tool runs by default, with the arguments shown under the tool name, which is a sensible setting to keep when a tool can change real data.
Some servers also offer an Add to Cursor link. It is the same JSON entry encoded into a cursor:// link, so clicking it opens Cursor with the server pre-filled. If a link opens Cursor but nothing appears, the JSON method always works. ChatMaxima publishes one on its Cursor setup page.
Connect an MCP server to VS Code with GitHub Copilot
VS Code’s Copilot chat gained a guided flow for MCP servers, so you no longer need to hand-edit JSON unless you want to.
- Open the Command Palette and run MCP: Add Server.
- Choose HTTP as the server type and paste the URL.
- Give the server an id, for example
chatmaxima. - Choose where to save it. Global makes it available in every workspace; a workspace destination keeps it with the project.
- When the server starts, VS Code shows its sign-in and tool approval prompts. Follow them.
To check it works, send a prompt that names the server and expand the tool call in the chat to confirm which server answered it. VS Code lets you switch individual tools on and off from the Tools view, which is useful on a server with dozens of tools.
Connect an MCP server to Gemini CLI
Google’s Gemini CLI, the terminal agent, supports remote HTTP servers and OAuth. Two options:
Install an extension. If the server’s publisher ships a Gemini CLI extension, one command adds the server, a context file with working rules, and any bundled skills:
gemini extensions install https://github.com/chatmaxima-com/chatmaxima-gemini-cli-extensionOr add the server directly:
gemini mcp add --transport http chatmaxima https://chatmaxima.com/mcpEither way, sign in from inside the CLI with /mcp auth chatmaxima, approve in the browser, and confirm with /mcp list, which prints the server and its tools.
The Gemini CLI is the supported path for Gemini today. Google’s consumer Gemini app connects to a curated set of apps rather than custom MCP URLs, and Gemini Enterprise has its own connector form for administrators.
Connect an MCP server to Grok
xAI added custom MCP connectors to Grok in 2026, so Grok can use any public MCP server, not only the ones in its catalog.
Grok on grok.com
- Go to grok.com/connectors.
- Click New Connector, then Custom.
- Paste the server URL and continue.
- Complete the sign-in and approve the workspace.
That is the whole setup. There is no per-chat toggle: Grok uses the connector’s tools whenever your question relates to that service. On Business and Enterprise plans, a team admin provisions the connector in xAI’s console first, after which each member signs in with their own account.
One requirement to remember from xAI’s own documentation: the server must be reachable over the public internet. A server running on your laptop needs a tunnel; a hosted server like ChatMaxima’s needs nothing extra.
Grok Build
Grok Build, xAI’s terminal coding agent, follows the same pattern as Claude Code:
grok mcp add --transport http chatmaxima https://chatmaxima.com/mcpIt opens the browser for OAuth on first use, or you can trigger sign-in yourself: run /mcps, select the server, and press i. Tools appear as chatmaxima__create_bot, chatmaxima__list_bots and so on. grok mcp doctor chatmaxima diagnoses a connection that will not come up.
What to ask once the server is connected
The connection is done when the tool list is populated. The fastest way to prove it works is a read-only request first, then a small write.
With ChatMaxima connected, these three prompts cover both:
List my chatbots and tell me which ones had errors this week.Draft a UTILITY WhatsApp template that confirms an appointment, with a
Reschedule quick reply, and show it to me before you submit it.Build a lead capture bot for a real estate agency: ask for the area, budget
and phone number, save the lead to contacts, then test it.Each of those turns into a chain of tool calls the assistant makes on its own, and each client shows you the calls as they happen. For a longer tour of what the server can do, see Introducing ChatMaxima MCP, and if you run an agency, Claude MCP and ChatGPT MCP for agencies covers connecting one assistant to many client workspaces.
What happens on the server side
A good MCP server limits what a connected assistant can do to what you could do yourself. When you sign in to ChatMaxima from any client, the connection is bound to the workspace you pick and to your own role in it. An agent in a support role cannot delete a bot, because you cannot either. Tools that change data are marked destructive so the client can ask before running them, and two actions, submitting a WhatsApp template to Meta and adding a column to your own spreadsheet, require an explicit confirmation in the conversation before the server will act.
You can see every app connected to a workspace, and revoke any of them, from Settings then Connected Apps in the dashboard. Revoking stops the connection immediately, whatever the client still believes.
Troubleshooting MCP connection errors
Most failures fall into a handful of causes.
The client says it cannot reach the server. Check the URL character by character. https://chatmaxima.com/mcp works with or without a trailing slash, but a typo in the host or a http:// prefix does not. Opening the URL in a browser shows nothing useful, because the server only speaks JSON-RPC over POST; that is normal, not a fault.
Sign-in opens but the client never shows as connected. You closed the browser before the last step. Finish the whole flow: sign in, choose the workspace, and click Approve. The client is waiting for the redirect back. In Claude Code and Gemini CLI, run the authenticate command again; in Cursor, click sign in again from Customize.
A pop-up blocker ate the sign-in window. Common in Claude on the web and ChatGPT. Allow pop-ups for the site and retry.
401 or “needs authentication” after it used to work. The token expired or was revoked. Clients refresh tokens on their own, but a revoke from the server side (for example from Connected Apps) needs a fresh sign-in. Sign out and in again.
The server is connected but shows no tools. Your account’s role on the server does not include anything the assistant can use, or you approved the wrong workspace. Disconnect, reconnect, and pick the right workspace. Tool lists also refresh on reconnect, so this fixes stale lists after a server update.
ChatGPT connected but refuses to make changes. That is the plan rule: Pro is read-only for custom connectors. Use a Business or Enterprise workspace, or do the write steps from Claude or a coding tool.
Cursor’s internal browser cannot load the sign-in page. Copy the address it shows into your normal browser and finish there.
Two config files define the same server. In Cursor and VS Code, a project file and a global file with the same server name confuse the client. Keep one.
A short security checklist
Connecting an assistant to a system that holds customer data deserves a minute of thought.
- Prefer OAuth over pasted keys. A key in a config file can be copied; an OAuth token is scoped, refreshable and revocable from the server side.
- Connect the narrowest account. On ChatMaxima, sign in with the role you want the assistant to have, and pick only the workspace it needs. Multi-workspace users can untick the ones a client should not reach.
- Keep tool approval on where it exists. Cursor and VS Code ask before each tool; leave that on for servers that can write.
- Review connected apps monthly. Every client you ever tried stays connected until you revoke it.
- Treat customer content as data. If an assistant reads conversations through a server, it must not follow instructions found inside them. ChatMaxima’s published skills say exactly that, and it is worth repeating in your own instructions.
The protocol itself is open and documented at modelcontextprotocol.io, including the authorization specification that OAuth-based servers follow, if you want to understand what the client is doing behind the sign-in page.
Connect once, then build
Connecting an MCP server is a five-minute job in every client once you know where the setting lives: a URL, a sign-in, and a check that the tools loaded. After that the assistant you already pay for becomes a hands-on operator of the service behind the server.
If the service you want to connect is ChatMaxima, every plan includes the MCP server, and the per-client guides on the ChatMaxima MCP docs keep the exact menu names current as the clients change. Pick a plan on the pricing page, connect the assistant you use most, and ask it to build your first bot.